
I recently had the need to set up Smart Card based authentication for the webMethods Integration Server and thought to myself, "Surely somebody must have already done this before and if I am lucky, documented it too". But after several days of searching and asking colleagues and webMethods experts I found no formal documentation or individuals who had previously accomplished this.
So, I embarked on the exercise on my own and, after a few hiccups, I found it to be relatively simple. Excited, I shared the solution with John Shoup, a colleague of mine at Nibble Technologies who encouraged me to document the steps, so that the next person doesn’t have to reinvent the wheel on this topic.
The step-by-step instructions are included in this post. The instructions have some references to Windows as I used the certificate management tools for Windows. But Windows is not a requirement, if you have the corresponding capabilities in the Operating System of your choice.
The summarized steps are as follows:
1. Export the authentication (client) certificate to file.
2. Export the signing certificate to file.
3. Import the authentication (client) certificate into the Integration Server and map it to a user.
4. Import the signing certificate into the Integration Server trust store.
5. Set up or update the TLS port to use the new configuration.
Export the authentication certificate to file
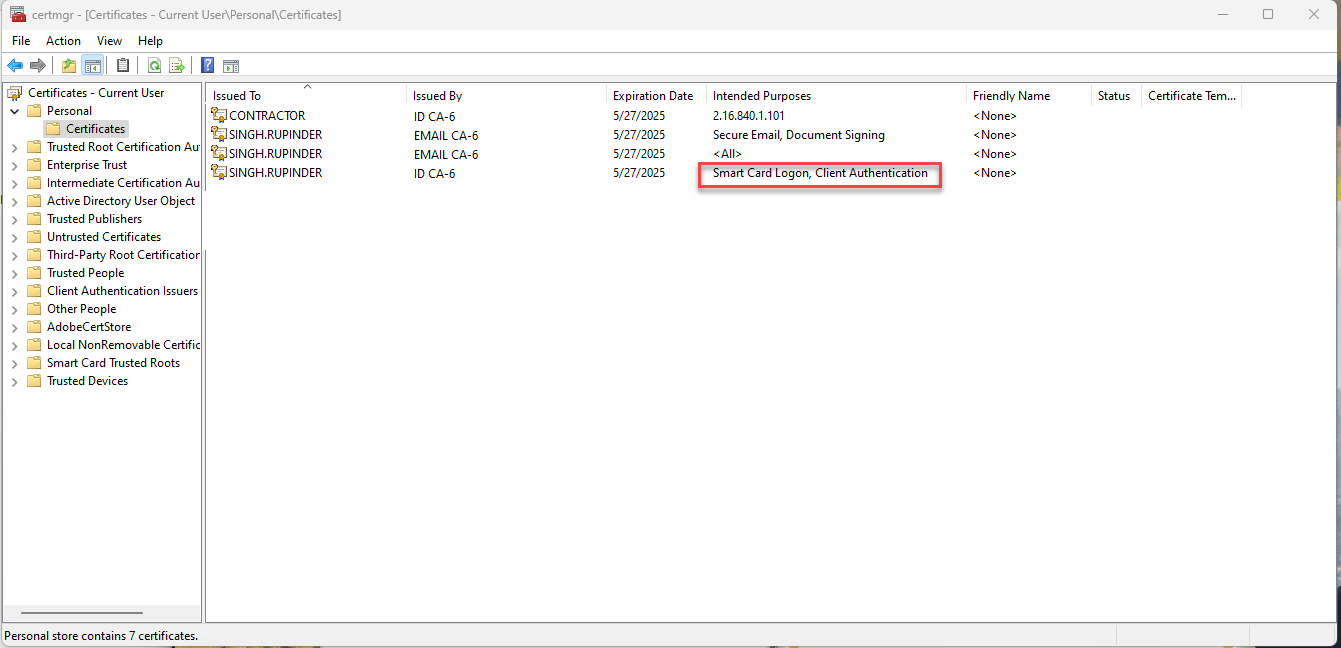
Smart Card installation will vary by vendor, so follow the vendor-specific instructions. Once you have the Smart Card setup on your computer, the Smart Cart certificates are installed in your Operating System and the authentication certificate needs to be exported. In Windows, open the certmgr utility and identify the certificate that has "Client Authentication" under the "Intended Purposes" column (See screenshot "Windows Certificate Manager".
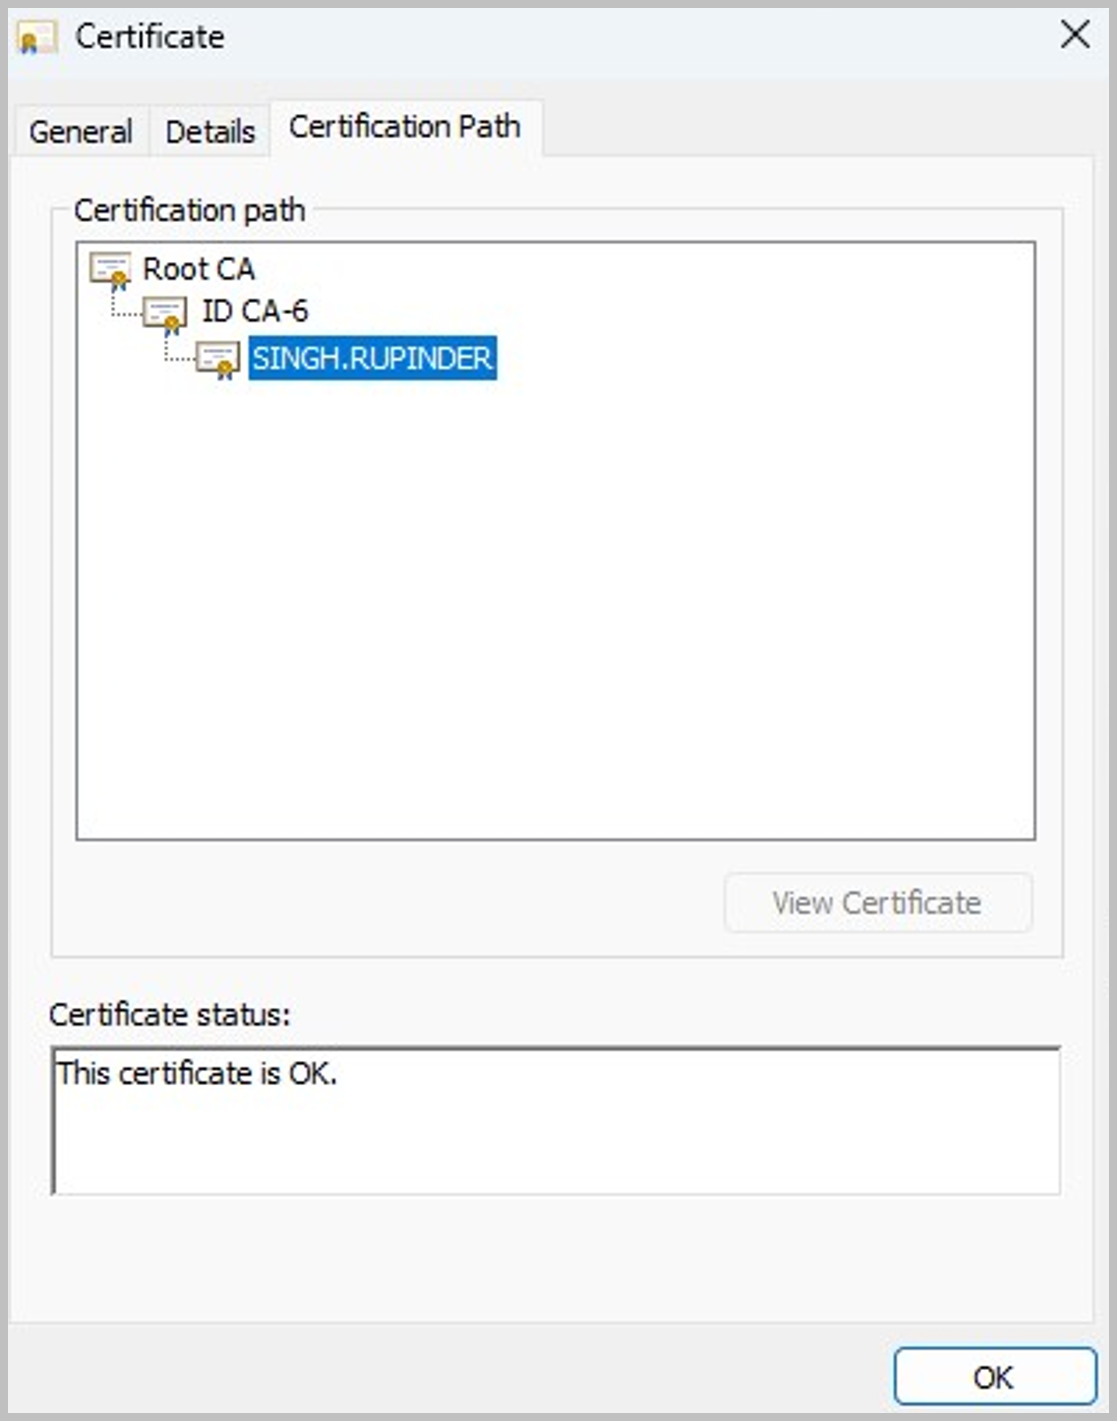
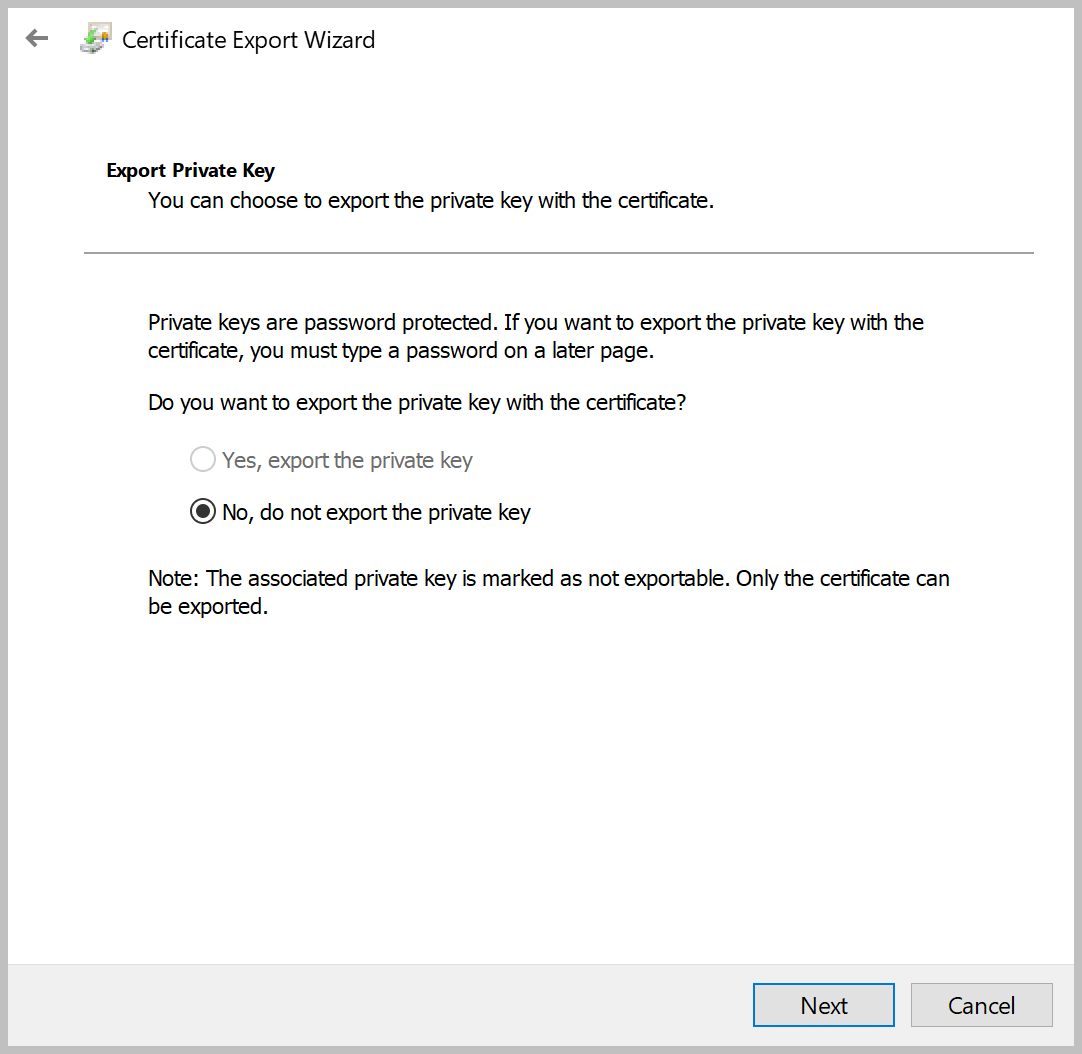
Open this certificate by double clicking on it (See screenshot "Client certificate") and then export the certificate to a file by clicking on the "Details" tab and then the "Copy to file..." button. When exporting, select the option to NOT export the private key with the certificate (See screenshot "Exporting client certificate"). Let’s name this file cert.cer.
Export the signing certificate to file
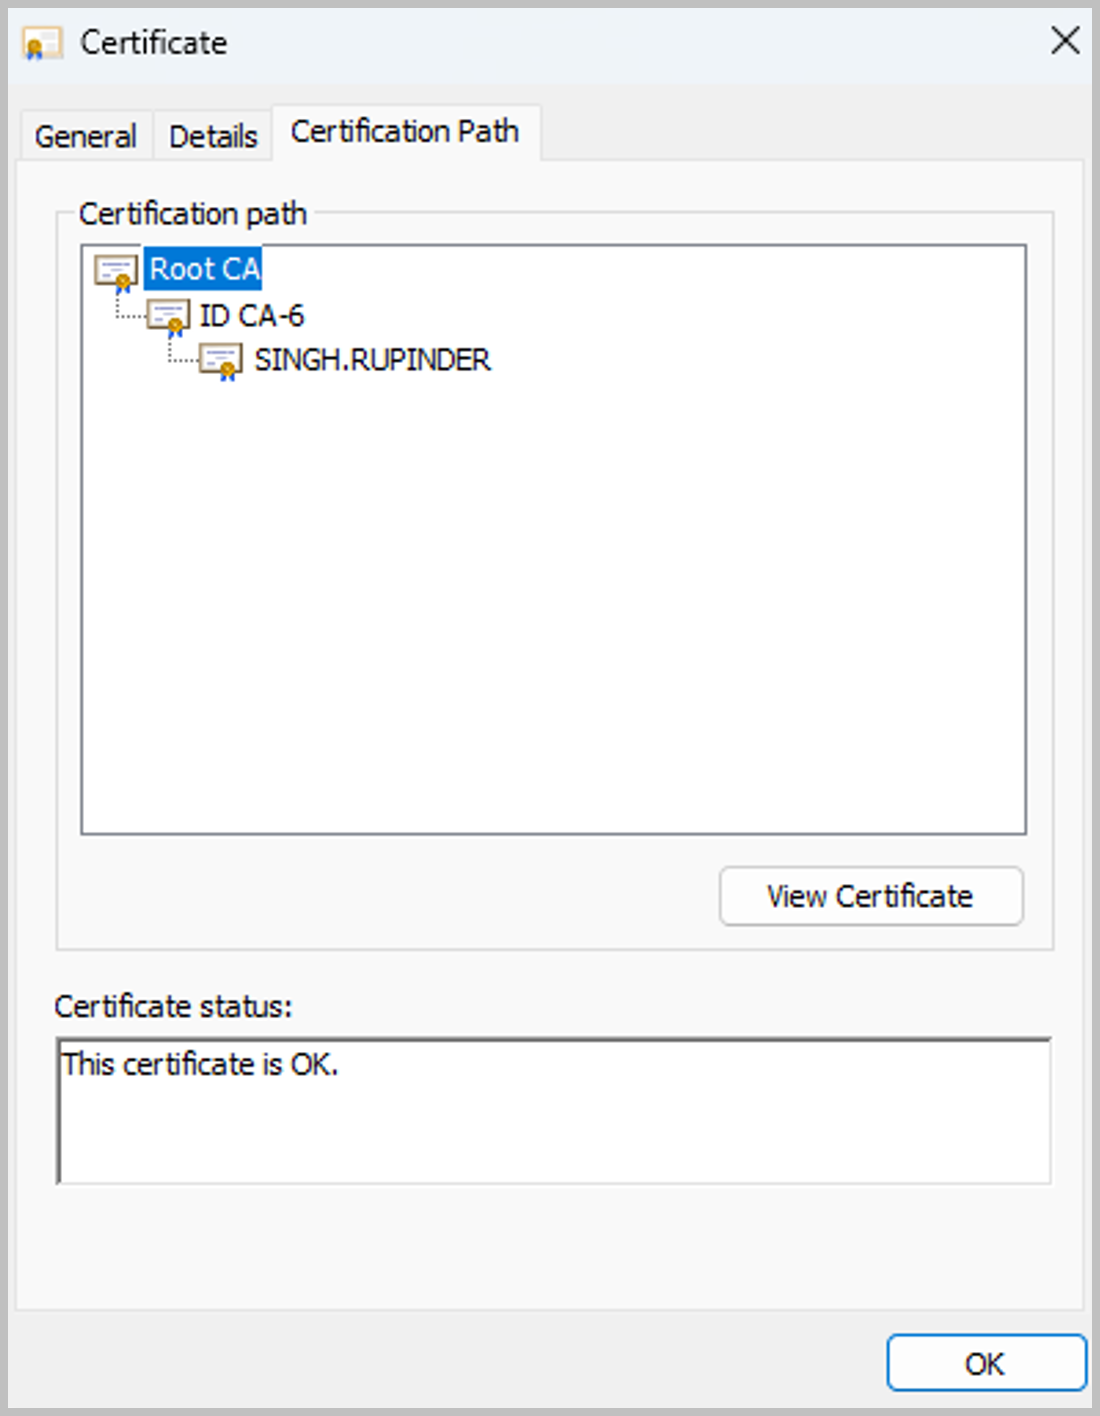
With the certificate still open in Windows certmgr, under the "Certification Path" tab, find the Root level certificate and and select the "View Details" button (See screenshot "Root certificate"). that to file too. Then repeat the certificate export process by clicking on the "Details" tab and then the "Copy to file..." button. Let’s name the file root.cer.
Import the authentication certificate into the Integration Server and map it to a user

Copy the cert.cer file that we created above to a folder on the Integration Server or to a folder that is accessible from the Integration Server. Login to the server Administration Console in your browser and select Configure Client Certificates from the Security -> Certificates menu. Make sure to select the full path of the file for the Certificate Path. Select a user that this certificate maps to (See screenshot "Configure client certificate". This user can be a local user or a directory services user. If it’s a local user make sure it’s in the correct Groups for the server assets that you want this user to have access to.
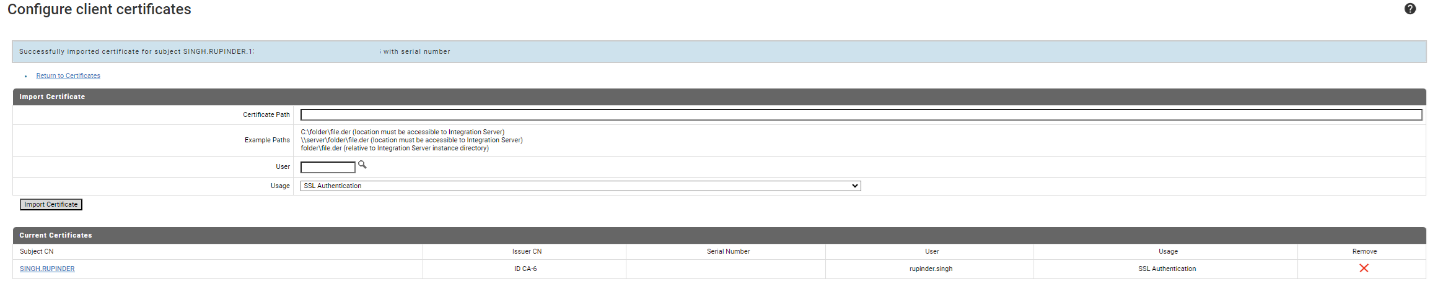
After importing the certificate, the details from the certificate and the user its mapped to will show up as in the figure below (See screenshot "Configure client certificate details")
Import the signing (root) certificate into the Integration Server trust store
Find the trust store that is being used for the TLS port that you intend to configure with certificates. If the port doesn’t exist then select any trust store file on the server that you intend to use. Use Java keytool commands to import the root.cer file created above and add it as a trusted certificate.
keytool -importcert -file <certificate-file> -keystore <truststore> -alias <alias> -storepass <password>
Configure the HTTPS port on the Integration Server
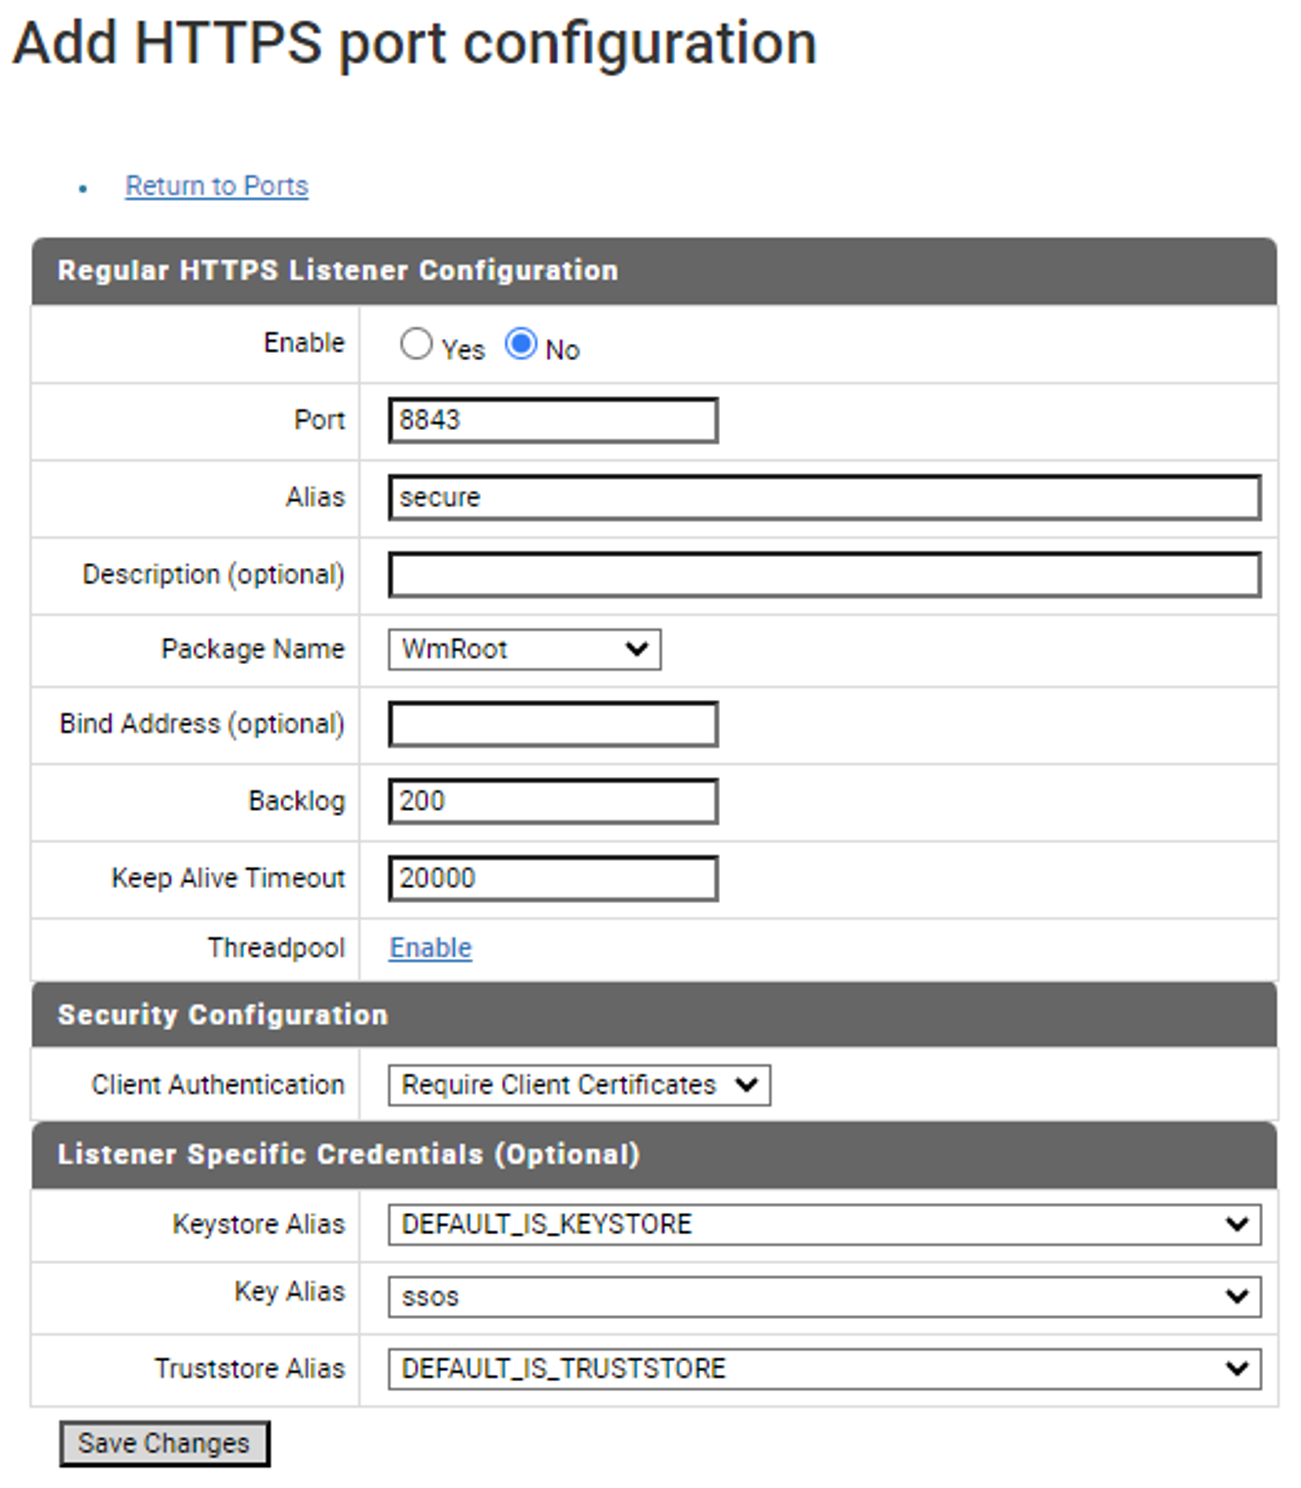
Set up a new HTTPS port or modify an existing one. Make sure that "Client Authentication" is set to "Require Client Certificates". Also ensure you select Truststore that was created above that includes root certificate from the file root.cer in it. (See screenshot "Port configuration")
Once the port is enabled, you are all set to test the configuration. Open a new browser and hit the URL of the newly configured port. For example, http://localhost:8443. If the configuration was done correctly, the browser will popup a dialog box and request the user to select a certificate to login in with. If additional information is needed, for example a PIN or other credentials to access the certificate, the browser will request that information as well. Once provided, the server should bypass the traditional BASIC auth login screen and grant access to the admin console.

